Expert Tips for Painting Wood Paneling: A Step-by-Step Guide
Let’s get down to business: painting wood paneling isn’t just a fresh coat of color, it’s a transformation. You’re about to turn that dark, retro look into something modern and bright. We’ll walk you through recognizing your type of paneling because each kind plays by its own rules when meeting a paintbrush.
Next up is prepping like a pro. From cleaning to sanding, we’ve got the lowdown on getting those panels ready for their big debut. But wait, there’s more! The right primer and paint can make or break your project – so we’ll help you pick the perfect pair.
You’ll also learn how to tackle the actual painting without any hiccups and keep those panels looking sharp over time with some easy maintenance tips. Ready? Let’s dive in!
Table of Contents:
- Understanding the Basics of Wood Paneling
- Preparing Wood Paneling for Painting
- Selecting the Right Primer and Paint for Wood Paneling
- The Painting Process Explained
- Navigating Common Challenges When Painting Wood Paneling
- Design Considerations for Painted Wood Paneling
- Maintaining Your Painted Wood Paneling
- Advanced Techniques for Professional Results
- FAQs in Relation to Tips for Painting Wood Paneling
- Conclusion
Understanding the Basics of Wood Paneling
Wood paneling isn’t just a relic from your grandparents’ basement—it’s making a serious comeback. But before you go slapping paint on those groovy panels, let’s talk shop about what you’re working with.
Different types of wood paneling have their own quirks. Solid wood planks are like that friend who can’t stand change; they expand and contract with the weather, so if you’re painting them, remember they need space to breathe. Veneer or laminate panels? They’re more chill but don’t take sanding too well—go easy on them.
If we get down to brass tacks, real wood needs special attention because it has natural oils that could make your new paint job look like a botched self-tan if not treated right. That’s why knowing the ins and outs is key for an epic transformation.
Selecting Your Materials
Picking out the primer and paint for your wooden canvas is crucial. Think of primer as that base coat when doing nails—it makes everything stick better. For woods prone to staining through the paint (like cedar), go for stain-blocking primers; otherwise, oil-based or latex will do the trick nicely.
Now onto paints—you want something tough enough to handle family game nights or pillow forts gone wild without chipping away at history. A satin finish usually works wonders since it hides imperfections yet cleans up faster than gossip spreads in small towns.
Cleaning House Before You Start
No one likes cleaning, but trust me: this step matters big time. Wash down those walls like there’s no tomorrow using trisodium phosphate (TSP cleaner)—it’ll cut through grime faster than hot knives through butter.
Rinse thoroughly afterwards though unless you want TSP streaks raining on your parade post-paint job—a total buzzkill after all your hard work.
Remember folks: good prep leads to less regret—and nobody wants regrets haunting their hallway every time they pass by their “masterpiece.” So take these tips seriously—they might just save your sanity during your next DIY adventure.
Takeaway:
Wood paneling is in again, but it needs TLC before painting—respect solid wood’s need for space and go gentle on the veneer. Pick the right primer and paint to avoid a DIY disaster and clean those panels well with TSP cleaner for a regret-free transformation.
Preparing Wood Paneling for Painting
So, you’ve got that groovy wood paneling in your den and you’re ready to bring it into this century with a fresh coat of paint. But hold up—there’s some prep work to do first if you want those walls to look top-notch.
Cleaning the Surface
Dust and grime are no friends to paint adhesion. Start by giving those panels a good scrub down with soapy water; think dish soap meets sponge on a Saturday morning car wash level of cleaning. Rinse well and let them dry faster than your favorite jeans on laundry day.
If any grease or stubborn spots are laughing at your cleaning efforts, show them who’s boss with some trisodium phosphate (TSP). Just remember, gloves are a must unless you’re fond of the ‘just cleaned an engine’ look for hands.
Sanding: Your New Best Friend
Glossy finishes can be as slippery as eels when it comes to getting paint to stick. Grab yourself medium-grit sandpaper and give the panels a light scuff-up; not too rough though—you’re going for ‘distressed’ jeans vibes rather than ‘survived an encounter with sandpaper monster.’
A vacuum cleaner followed by tack cloth is like the dynamic duo for removing all that dust before moving on—it’s crucial because stray particles could make your painting job feel like textured walls when you were gunning for smooth sailing.
Tackling Grooves Head-On
The grooves in wood paneling love playing hide-and-seek with paint. To win this game, use caulk or putty – whatever floats your boat – but fill ’em up until they’re smoother than jazz on Sunday mornings. Here’s how pros handle these pesky gaps, just don’t go overboard or it’ll look puffier than overstuffed pillows at grandma’s house.
Remember, patience is more than just a virtue here—it’s pretty much mandatory.
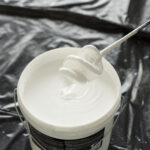
When everything is spick-and-span, we move onto primers—a painter’s secret weapon against bleed-throughs from past lives (of the wood). Pick one that suits both oil-based and latex paints because flexibility matters even outside yoga class.
Use high-quality rollers designed specifically for paneled surfaces; they’ll hug every contour like tailored suits ensuring each crevice gets its fair share of color.
So gear up folks. With these steps under our belt, we’re about halfway there. Let’s keep the momentum going and tackle the next challenges head-on. We’ve got this.
Takeaway:
Ready to ditch the dated wood paneling look? Start with a deep clean using soapy water, then tackle any tough spots with TSP. Sand down glossy finishes for better paint grip and fill in those grooves to ensure smooth coverage. Choose a versatile primer for your undercoat and use rollers that get into every nook—prepping right leads to painting success.
Selecting the Right Primer and Paint for Wood Paneling
Choosing the right primer and paint for wood paneling is like picking a trusty sidekick in your home renovation superhero squad. Get it wrong, and you’ll be facing off against peeling paint in no time. But nail the choice, and you’re looking at a smooth, durable finish that will stand up to even the most villainous wear and tear.
The Role of Primer: Your First Line of Defense
A good primer sets the stage for painting success. It’s crucial on wood paneling because it fills in those little grooves, making sure your topcoat goes on nice and even. If you want an oil-based or latex stain-blocking primer—this hero can hide dark stains better than any other.
If knots are part of your panel’s charm, grab a shellac-based product to prevent them from bleeding through over time. Remember when I painted my den? Those pine knots were pesky until I used shellac-based primer. Worked like magic.
Finding Your Perfect Paint Partner
Picking out paint isn’t just about what looks pretty—it needs to perform too. Satin or semi-gloss finishes are best buddies with high-traffic areas since they clean up faster than you can say “spaghetti sauce splatter.”
You also need something resilient that sticks around longer than guests after game night ends—that means opting for 100% acrylic-latex paints known for their sticking power.
Mix & Match Like A Pro
Now here comes the fun part: mixing and matching primers with paints like you’re crafting an epic playlist—one where every song hits just right. Pair that heavy-duty oil-based primer with vibrant satin-finish paint to get both toughness and pizzazz.
I remember this project we did called Franklin Painting—we matched our products so well; that customers thought we’d brought new life into Narnia itself. And yes, while there might not be any magical wardrobes involved here today—you’ve got all it takes now to transform those panels into works of art worthy of awe.
Takeaway:
Pick the right primer and paint for wood paneling to avoid peeling and achieve a durable finish. An oil-based or latex stain-blocking primer will cover stains, while shellac is best for knots. For high-traffic areas, choose satin or semi-gloss 100% acrylic-latex paints for easy cleaning and longevity.
The Painting Process Explained
Painting wood paneling isn’t like covering a flat canvas with your favorite shade of blue. It’s more akin to giving a grooved beard trim – you’ve got to navigate the ridges without leaving patchy spots.
Cleaning and Sanding: The Dynamic Duo
Before painting, cleaning is paramount; it’s the unsung hero that prevents your chic paint from peeling off like old wallpaper. Mix some mild detergent with water, grab a sponge, and show those panels who’s boss. Once dry, it’s time for sanding – not down to bare wood but just enough to roughen up the surface so that primer thinks twice before sliding off.
Sanding can be messy though. So if you’re doing this indoors, make sure you seal the room faster than a secret at Area 51 because dust will try its best to escape.
Laying Down Primer Like Foundation Makeup
You wouldn’t apply makeup without foundation unless you were going for ‘au naturel’. Likewise, don’t skip priming your panels or they’ll drink up your expensive paint quicker than guests hitting an open bar at happy hour. An oil-based primer usually sticks better than gossip in small towns and helps cover any imperfections on older wood surfaces.
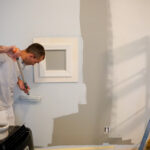
Painting: Steady Hand on Deck
A roller might seem like an obvious choice but using one here would be as effective as trying to eat soup with chopsticks—possible but unnecessarily complicated. A brush works best; start by cutting in around edges then fill in those wide-open fields (panels). For consistency shake hands with even pressure—you want each stroke looking uniformed like soldiers in parade formation—not wavy like my Aunt Marge after two martinis.
Beware of drips. They are sneakier than calories in a salad dressing—they’ll find their way into crevices when unchecked—but catch them early and smooth out immediately for seamless results.
Navigating Grooves Without Losing Your Cool
Grooves require special attention since they love hogging excess paint only to regurgitate it later creating ugly blobs reminiscent of tacky Halloween decor. Take advantage by angling your brush during application—it’s about precision placement not unlike threading needles or getting toddlers into pajamas—patience is key.
Takeaway:
Before painting wood paneling, clean and sand to prep the surface—think of it as grooming before a big event. Use an oil-based primer for an even base that clings like a rumor in a small town. When painting, ditch the roller for a brush to expertly navigate grooves without messy drips or blobs.
Navigating Common Challenges When Painting Wood Paneling
Painting wood paneling is like playing a game of chess. You need strategy, patience, and a few clever moves to checkmate the quirks it brings. But don’t worry; you’ve got this.
Avoiding Uneven Paint Absorption
The first challenge that might sneak up on you is how thirsty old wood can be. Some spots will drink up paint faster than your uncle at an open bar wedding. To combat this, start with a high-quality primer specifically designed for wood surfaces like these options recommended by experts. This step seals in the variable absorption rates and gives you a uniform canvas for that glorious topcoat.
Sometimes even after priming, the panels play hard to get when accepting paint evenly. If streaks appear or some areas look duller than others, don’t panic—apply another coat of primer before moving on to painting.
Tackling Tricky Textures
If your panel’s texture could rival an abstract sculpture at The Met, fear not. Those grooves may seem daunting but there’s a simple fix: use brushes with longer bristles or foam rollers that conform to crevices better as shown here. They’ll help cover every nook without leaving patchy sections behind.
Dip just enough so they’re not dripping all over your floors (because we want more ‘ahhs’ not ‘ughs’), then go ahead and channel Bob Ross—just remember those happy little trees were meticulous works of art too.
Battling Bleed-through Stains
Last but not least favorite are those pesky stains deciding they want their fifteen minutes of fame through your fresh paint job. Whether it’s water damage making its mark or knots in the wood being attention-seekers—you’ll need a stain-blocking primer as backup singers to dim their spotlight This Old House lays out some prime choices here.
Lay down two coats if needed because it’s worth taking center stage without uninvited cameos ruining the show.
Takeaway:
Wood paneling can be thirsty, soaking up paint unevenly. A quality primer is your best friend here—like a trusty sidekick, it evens out the playing field for that perfect topcoat.
Groovy textures? No sweat. Grab brushes with longer bristles or foam rollers to get into those crevices and smooth over any rough spots like a pro.
Fighting stains? Double down with stain-blocking primer. It’s your secret weapon to keep those pesky blemishes from crashing your paint party.
Design Considerations for Painted Wood Paneling
It’s an art that requires you to channel your inner Michelangelo, but instead of the Sistine Chapel, you’re working with groovy 70s walls. Choosing the right colors can either make your space feel like a time capsule or bring it into the 21st century.
Picking Your Palette: Color Me Impressed
The color choice is crucial because let’s face it – avocado green had its moment. Lighter hues can give small rooms the illusion of more space while dark tones add depth and coziness. If choosing one color feels as daunting as picking your favorite child, consider testing out several shades. They play together differently depending on lighting and surrounding elements so don’t skip this step.
If neutrals are too ‘meh’ for your taste buds, go bold. But remember: The bolder the choice, the stronger its vibe will be over time. You might love hot pink now but think about whether future-you will want to live inside a bubblegum wrapper.
The Texture Tango: Smooth Moves Only
You’ve got texture options galore when painting wood paneling—like keeping those retro lines visible or going sleek with filler to smooth things out before painting begins. Just know that smoother surfaces bounce light around better than New Year’s Eve disco balls which means more visual real estate in any room.
Sanding down glossy finishes gives primer something to cling onto like best friends braving Black Friday sales together; so don’t gloss over this part (pun intended).
A Nod To Nature: Keeping It Real With Faux Finishes
Maybe you want some rustic charm without living in an actual log cabin. Faux finishes are where it’s at then. Techniques such as graining or distressing can conjure up visions of country retreats faster than you can say ‘shiplap’. Before committing though, try experimenting on smaller sections because there’s nothing worse than faux-pas finishes staring back at every morning coffee run through your kitchen.
Takeaway:
Painting wood paneling is more than just a paint job—it’s about picking the right color to modernize your space and choosing textures that change how light dances around the room. Test colors before you commit, smooth out surfaces for extra shine and consider faux finishes for a touch of rustic without going full lumberjack.
Maintaining Your Painted Wood Paneling
So, you’ve painted your wood paneling and it looks as sharp as a new pin. But wait. The job’s not done yet. Keeping that smooth, chic look means rolling up your sleeves for some maintenance magic.
Cleaning Like a Pro
First things first: keep the dust bunnies at bay. A simple wipe-down with a damp cloth can do wonders to preserve the paint’s luster—just like brushing your teeth keeps those pearly whites shining. When life happens and smudges appear, mix up a gentle soap solution to get back that pristine look without going all Mr Clean on your walls.
Remember though, too much water is like kryptonite to Superman—it’ll weaken the paint over time. So dab gently; no soaking.
Tackling Touch-ups With Ease
Nicks and scratches are inevitable—like taxes or losing one sock in the laundry—but don’t fret. Keep leftover paint from your original job because matching colors later can be tougher than finding Waldo in his stripey hideout.
To fix these little imperfections, lightly sand the affected area before applying touch-up paint with precision worthy of an artist—or just carefully use a small brush if you’re less about finesse and more about function.
Avoiding Fading From UV Rays
The sun might bring warmth and light into our lives but it’s also notorious for fading color faster than fashion trends change. If possible, hang curtains or blinds where direct sunlight hits hardest; this will help shield your panels from UV rays’ unforgiving glare—a bit like sunscreen for your walls.
Now go ahead. Show off those gorgeous wood panels knowing they’re armed against everyday wear and tear with these savvy upkeep tips.
Advanced Techniques for Professional Results
If you’re ready to step up your wood paneling game, advanced techniques can give that sleek, envy-inducing look. We’ve been around the block a few times with brushes and rollers, so let’s share some secrets from our paint-splattered playbook.
Taping Off Like a Pro
Ever seen those crisp lines that seem laser-cut? That’s no accident. It starts with quality painter’s tape—think of it as the unsung hero of clean edges. Apply it firmly along trim and ceiling lines for defense against wayward strokes. But here’s where we go ninja: after laying down the primer, seal the edge of the tape with a bit of base coat paint before going bold with color; this seals any micro gaps for bleeding prevention better than Fort Knox.
The Backrolling Technique
Sprayers are fast but they can leave an impersonal touch—a roller follows behind to add texture and warmth like a sprinkle of cinnamon on your latte. Start by spraying your chosen hue evenly across panels then quickly backroll while still wet, ensuring every groove gets love without looking flooded.
Dry Brush Detailing
A dry brush is not just for antique furniture or shabby chic looks—it adds depth when used sparingly on wood paneling too. Dip just tips into paint then wipe off excess until almost nothing remains before lightly dragging over raised areas; think highlighting cheekbones but less glam squad more DIY squad.
Incorporating these tricks takes practice but remember Rome wasn’t painted in a day—and neither will your walls be (although we wish). Just take it one stroke at a time and soon you’ll have people asking if Michelangelo stopped by during his downtime.
FAQs in Relation to Tips for Painting Wood Paneling
What kind of paint do you use on wood paneling?
Satin or semi-gloss latex paint works best on wood paneling for a durable finish that’s easy to clean.
How do you prepare wood paneling for painting?
Clean the surface, sand it down, wipe off dust, and apply primer before painting. This ensures better adhesion.
Should I paint wood paneling with a brush or roller?
A roller gives quick coverage; use a brush for edges and grooves. For smooth results, combine both tools.
What happens if you don’t sand paneling before painting?
If you skip sanding, paint might not stick well. You’ll risk peeling and an uneven finish over time.
So, you’ve mastered the tips for painting wood paneling. Remember, knowing your panel type is key. Start by preparing those surfaces well; clean and sand for that flawless finish.
Pick the right primer and paint combo – it’s crucial for durability. Apply them with care; even strokes lead to stunning results.
Face challenges head-on: drips, streaks, or peeling won’t stand a chance when you’re informed. And once painted? Keep up with simple upkeep to make beauty last.
This isn’t just about a fresh look—it’s about creating lasting value in your space. So take these lessons, put brush to wood, and watch as every stroke redefines your home.