Do I Need to Tape Before I Paint?
Painting a room is the best way to update its personality and aesthetics. But before picking up a brush or roller, you need to prepare the space. Apart from moving furniture, laying down drop cloths, and cleaning baseboards, many DIY painters often neglect an important step — taping.
As a rule of thumb, professional painters advise applying painter’s tape. It helps to assure clean lines with no messy edges making your painting project look more professional. But some DIY painters believe that taping takes too much time and is unnecessary. We’ll take a look at some of the reasons why you should use tape before painting, and some tricks of the trade to make the job faster.
Why You Should Tape Before Painting
Painter’s tape is an inexpensive item that is widely available in any hardware or craft store. It helps avoid painting mistakes and makes your project more productive. Pros also use painter’s tape to ensure straight lines, prevent overlaps and avoid getting paint on other surfaces like the molding or ceiling.
The tape is applied to surface areas that you don’t want to paint or will use another paint color. For instance, applying tape to the molding will allow you to paint a wall faster ensuring you can paint all the way down to the edge of the molding without getting paint on the molding itself. Also, the painter’s tape is designed to adhere to the surface without leaving marks or residue.
Other types of tape, like masking tape, for example, will not adhere to all surfaces, and some kinds of tape can leave glue marks on the surface.
Painter’s tape can be applied to practically any surface like windows, ceilings, walls, and wood furniture. It is easily removed without splintering, so you don’t have pieces of tape stuck to the surface. It also won’t peel off while you’re painting. The tape can also help in creating colorful shapes and intricate designs and patterns.
Taping Tricks of the Trade
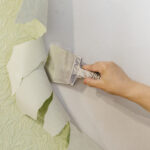
Before applying the tape, make sure the surface is clean and dry. It will ensure that the tape will adhere to the surface. Rather than cutting pieces of tape, it is best to carefully unroll the tape using your finger to guide the tape along the surface. Here’s a pro tip: You can use a tape applicator that makes applying painter’s tape to the surface even faster. It also helps ensure that the tape is straight along the surface. It is especially helpful when you want clean edges. After you apply the tape to the surface, use your fingers to press down to secure the tape to the surface. Wait approximately 60 minutes for the tape to set before painting.
Professional painters often debate whether to do the walls or trim first, but a common approach is to paint the trim before tackling the walls. This order allows for easier tape application and cleaner lines. When it comes to removing painters tape, timing is crucial; it’s recommended to remove it as soon as the paint is dry to the touch to prevent peeling. The best painters tape, such as Frog Tape, offers superior adhesion and clean removal, justifying its higher price. Before painting, preparation is key; ensure the room is clean and repairs are made for a smoother process. How long it takes to paint a room varies, but efficient planning and knowing how to tape for painting walls can significantly reduce the time. Remember, quality painters tape and proper techniques can make a significant difference in the outcome of your painting project.
 When to Remove the Painter’s Tape
Wait until the painted surface is completely dry before removing the tape, usually 24 to 48 hours. The last thing you want to happen after spending all that time prepping and painting are for a drip of paint to ruin your entire project. Remove the tape by carefully lifting and peeling back the tape on an angle. The result will be a professional-looking paint project with clean, straight lines.
Understanding the best practices in painting is essential, especially when deciding on the order to paint a room. Professional painters often advise painting the trim before walls because it allows for a more precise tape application, ensuring crisp, clean lines. This method highlights why high-quality painter’s tape, like Frog Tape, is worth the investment due to its superior edge-seal technology that minimizes bleed-through. The question of when to remove the painter’s tape is crucial; it should be peeled off slowly and at an angle once the paint is dry, usually within 24 to 48 hours, to avoid tearing off dried paint. Preparing your space by cleaning and taping before painting ensures a smoother process and a professional finish. Remember, the success lies in the details, from selecting the best painter’s tape to the timing of its removal.
Strategic Painting: Trim First or Walls?
The debate on whether to paint walls or trim first is common among professional painters and DIY enthusiasts. The consensus leans towards painting the trim first for several reasons. This approach allows for a more manageable cleanup and ensures that any unintentional brush strokes on the walls can be easily covered when painting them afterward. It aligns with the best practices for achieving a polished finish, especially when learning how to paint without tape or aiming for painting edges without tape.
However, if you prefer to tape, knowing how to use tape when painting can significantly impact the quality of your project. Painter tape is a barrier, creating sharp lines and protecting surfaces from unwanted paint. Yet, the question often arises: why is painters tape so expensive? The answer lies in its specialized adhesive and edge-seal technology, designed to prevent paint bleed and ensure clean removal — qualities that justify the cost for many professionals.
Cost Considerations and Techniques
For those curious about how much it costs to paint a room, it’s not just the paint itself but also the preparation and finishing methods that contribute to the overall expenses. The self-employed painter’s hourly rate varies, but investing in a professional can sometimes save money in the long run by avoiding mistakes and wasted materials. When considering taping walls before painting, this step, although time-consuming, is crucial for those prioritizing crisp lines and flawless results.
For ambitious DIY painters seeking how to paint trim without tape or the easiest way to paint a ceiling, mastering certain techniques can elevate the quality of your work, even without professional tools. However, for spaces where precision is less critical, or where a rustic charm is desired, learning these skills can enhance the personal satisfaction of completing a home project.
Whether you decide to paint the walls or trim first, employing the right strategies from preparation to the final touches contributes significantly to the success of your painting project. Remember, the sequence in which you paint, the use of tape, and the quality of your materials all play pivotal roles in achieving that sought-after professional look.
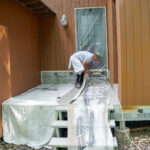
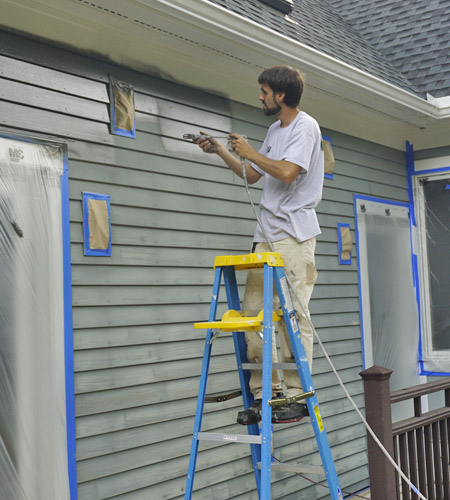
Franklin Painting crews can meet your painting needs! Offering exterior house painting, interior painting, deck staining, and more. Our professional house painters can do the job! Our highly trained, professional and courteous employees make sure the job gets done the way you deserve.